The TekSeal GRP Roofing Method
A properly laid fiberglass roof will last for at least 30 years with no measurable deterioration.
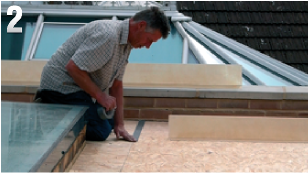
Roof Preparation
You may be working with a new or existing flat roof. All surfaces should be clean & dust free. Allow to dry and clear all unnecessary items off the roof before mixing your first batch of resin.
You should ensure that the plywood boards (typically 18mm exterior plywood or OSB sterling board) are laid to adequate falls in order to allow good drainage, to eliminate any standing water on the roof after completion.
You cannot laminate effectively onto a bitumous or painted surface as this will retard the cure of the resin used. It is possible that some of the boards underneath will be rotten or have rotten areas which will need replacing.
A possible alternative to stripping back to a clean sound surface is to simply board over the existing surface with fresh boards and then apply GRP to them (you need to ensure that the existing boards are in sound condition).
Resin may not adhere to all plastic products. If you have any plastic, ie: outlets, make sure that you fully abrade the plastic with 80 grit sandpaper before laminating over them. If the laminate does not adhere you can use a sealant (we recommend ct1) or check out our pre-formed GRP drain outlets online.
Do not work in threatening weather conditions! Fibreglass/Resin does not like the rain/snow or temperatures below 0℃
Affects of Temperature
The ideal working temperature for GRP laminating whether moulding or sheathing is around 15-18℃C, at temperatures below 15℃C there is a great risk of the Resin or Topcoat 'under curing' and not reaching its formulated properties. Please ask for our specialist resins if you are working in the UK during the winter. At high temperatures (30℃C or above) materials will cure quicker, even in small quantities. It is advisable NOT to use Topcoat in direct sunlight.
Anyone carrying out a GRP projects outdoors should expect inclement weather to play a part in the project, therefore a temporary workshop might consist of just plastic sheeting should it rain, or better still, some form of support or ridge pole to create a basic tent structure - this is difficult when you are working on a roof, perhaps consider working a temporary roof into your budget. Heating MUST be dry heat, not of the type that creates moisture (ie: not calor or oil filled space heaters as these produce large quantities of water vapour and will inhibit resin cure). Electrical or convector heaters are ideal, and once under a supported cover, can provide good working conditions for completion of the job.
Items Required
450g chopped strand matting
Polyester Resin (of good quality)
Flow coat (pre-pigmented with colour of choice)
Catalyst for resin and flow coat
Acetone (brush/roller cleaner)
Catalyst dispenser
Throw away brushes
Mixing sticks
16 Litre storage bucket with lid (for storage of tools in acetone)
Paint rollers
Metal consolidating roller
Rubber gloves
Resin removing cream (hand cleaner)
2.5 litre mixing buckets
Preparation

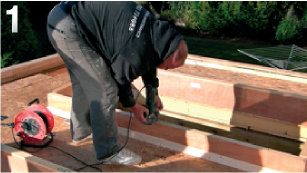
If using plywood or OSB boards, ensure that you nail or screw down securely.
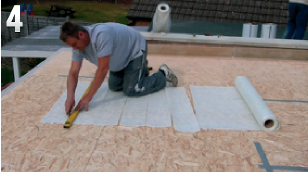
Cut chopped strand matting into strips for ease of use.
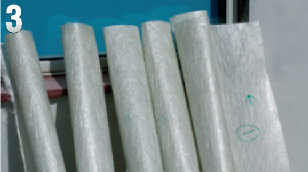
Roll up the matting and leave aside ready for use.
Ensure that your catalyst is in a dispenser ready for measuring
Are all tools and materials at hand?
Make sure that you have the Acetone ready for use in small buckets
Ensure roof surface is dry and reasonably clean
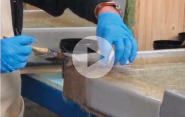
Affixing trims and corners
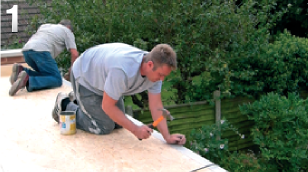
Sand and Fix pre-formed trims and corners where required
Preparation
Ensure any external right angle corners are rounded or chamfered for ease of lamination (chopped strand matt does not like external right angles!)
Tape can be used to cover any screw holes or gaps in your boards
Mixing
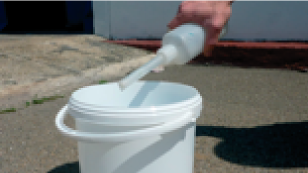
Mix 1kg of resin with correct ratio of catalyst (using a catalyst dispenser or syringe). Resin/catalyst ratios vary depending on the weather conditions (see measuring chart below). It is imperative that the correct catalyst ratio is used, you must not use any less than 10ml or more than 40ml of catalyst to 1kg resin otherwise you will encounter under curing problems.
| Catalyst Usage Chart | ||||
|---|---|---|---|---|
| Deck/Resin Temp | 29-35°C | 21-28°C | 13-20°C | 6-12°C |
| Percentage Catalyst | 1% Catalyst | 2% Catalyst | 3% Catalyst | 4% Catalyst |
| Table of percentages in millimetres, per weight of resin usedCatalyst usage chart | ||||
| Amount Of Resin | Catalyst Usage | |||
| 1 Kilo | 10ml | 20ml | 30ml | 40ml |
| 2 Kilo | 20ml | 40ml | 60ml | 80ml |
| 3 Kilo | 30ml | 60ml | 90ml | 120ml |
| 4 Kilo | 40ml | 80ml | 120ml | 160ml |
| 5 Kilo | 50ml | 100ml | 150ml | 200ml |
| 6 Kilo | 60ml | 120ml | 180ml | 240ml |
| 7 Kilo | 70ml | 140ml | 210ml | 280ml |
| 8 Kilo | 80ml | 160ml | 240ml | 320ml |
| 9 Kilo | 90ml | 180ml | 270ml | 360ml |
| 10 Kilo | 100ml | 200ml | 300ml | 400ml |
| 11 Kilo | 1100ml | 220ml | 330ml | 440ml |
| 12 Kilo | 120ml | 240ml | 360ml | 480ml |
| 13 Kilo | 130ml | 260ml | 390ml | 520ml |
| 14 Kilo | 140ml | 280ml | 420ml | 580ml |
| 15 Kilo | 150ml | 300ml | 450ml | 600ml |
| 16 Kilo | 160ml | 320ml | 480ml | 640ml |
| 17 Kilo | 170ml | 340ml | 510ml | 680ml |
| 18 Kilo | 180ml | 360ml | 540ml | 720ml |
| 19 Kilo | 190ml | 380ml | 570ml | 760ml |
| 20 Kilo | 200ml | 400ml | 600ml | 800ml |
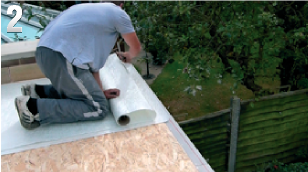
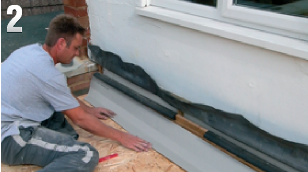
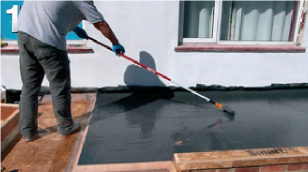
Laminating
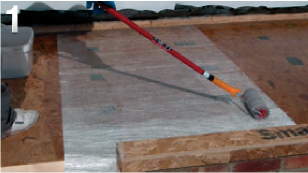
Using blue stripe resin roller on an extension pole apply a thick coat of catalysed resin to the boards and immediately lay matting onto the wet surface, apply more resin.
Once the matting is totally wetted out (you will need to use approx. 1kg resin to 1m square of matting) proceed to the next step.
Keep a container of acetone next to you at all times and regularly clean the consolidating roller, this will keep it in good working order.
You are now ready to repeat the procedure with the second layer of Chopped Strand Mat.
Always stagger overlaps of matting to avoid a section becoming too thick.
Lay the second strip of matting over the first while it is still wet and coat with resin using a blue stripe resin roller.
Using a metal roller, consolidate the 2 layers making sure that you eliminate any trapped air and wrinkles (you will notice your lamination changing colour as you consolidate). Try not to push too hard, this will create bumps in your matting and look unsightly when cured. It is easier to achieve a nice finish using a bolt roller rather than a paddle roller but both are the correct tools for the job.
IMPORTANT - do not skip the consolidation, it is a very important process that will knit the 2 layers together giving you a strong end result. Make sure all areaas are wetted out well, dry patches result in leaking roofs.
Repeat
Move across to the next area and repeat step 4, ensuring that the joints in each layer are overlapped by the succeeding layer (a 2 inch overlap is fine)
Allow to harden for at approx. 1 - 2 hours before applying the Topcoat. If you do not have time to finish on the same day you can leave the laminated roof for a few weeks before applying the topcoat but make sure it is completely dry and dust free when you start again. If it is left for longer than a few hours it is a good idea to go over the laminate with Acetone too as this will liven the laminate and help to ensure a good bond.
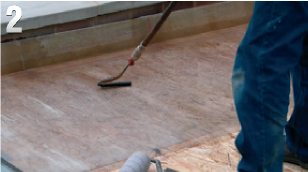
Top Coat
Topcoat is an important part of the lamination - Topcoat (aka Flow Coat) has the weathering properties that are required in an outdoor structure, it protects your laminate from the UV as well as frost etc.
Mix approximately 5kg of Flow Coat with the catalyst (approx. 10ml - 40ml depending on the outdoor temperature).
Paint the catalysed Top coat to the surface of the whole roof with a magic felt topcoat roller (you should aim for 600g of Top coat to 1m square in area). Remember that applying the Top coat is not like painting - you need to work quickly and do not fuss over your painting techniques, the Top coat will find its level to a certain extent.

fibreglass supplies for flat roofing and all types of fibreglass projects
connect with us >